- Bài 1: Node.js - Giới Thiệu
- Bài 2: Nodejs - Khởi tạo server
- Bài 3: NodeJS - REPL Terminal
- Bài 4: NodeJS - NPM
- Bài 5: NodeJS - Khái niệm callbacks
- Bài 6: Nodejs - Sự kiện lặp
- Bài 7: NodeJS - Sự kiện Emitter
- Bài 8: NodeJs - Buffer
- Bài 9: NodeJS - Streams
- Bài 10: NodeJS - Đọc ghi File
- Bài 11: NodeJS - Biến toàn cục
- Bài 12: NodeJS - Utility Module
- Bài 13: NodeJS - Web Module
- Bài 14: NodeJS - Express Framework
- Bài 15: NodeJS - RESTful API
- Bài 16: NodeJS - Request
- Bài 17: NodeJS - Response
- Bài 18: NodeJS - Scaling Ứng dụng
- Bài 19: NodeJS - Package
Bài 14: NodeJS - Express Framework - NodeJS cơ bản cho người mới bắt đầu
Đăng bởi: Admin | Lượt xem: 3469 | Chuyên mục: NodeJS
Giới thiệu Express Framework
Express là một framework nhỏ và tiện ích để xây dựng các ứng dụng web, cung cấp một lượng lớn của tính năng mạnh mẽ để phát triển các ứng dụng web và mobile. Nó rất dễ dàng để phát triển các ứng dụng nhanh dựa trên Node.js cho các ứng dụng Web. Dưới đây là các tính năng cơ bản của Express framework.
Cho phép thiết lập các lớp trung gian để trả về các HTTP request.
Định nghĩ bảng routing có thể được sử dụng với các hành động khác nhau dựa trên phương thức HTTP và URL.
Cho phép trả về các trang HTML dựa vào các tham số truyền vào đến template.
Cài đặt Express Framework
Đầu tiên, cài đặt Express framework sử dụng npm như sau:
$ npm install express --saveLệnh trên lưu phần cài đặt trong thư mục node_modules và tạo thư mục express bên trong thư mục đó. Dưới đây là các thành phần module quan trọng được cài đặt cùng với express:
body-parser - Đây là một lớp trung gian node.js để xử lí JSON, dự liệu thô, text và mã hóa URL.
cookie-parser - Chuyển đổi header của Cookie và phân bố đến các req.cookies
multer - Đây là một thành phần trung gian trong node.js để xử lí phần multipart/form-data.
$ npm install body-parser --save
$ npm install cookie-parser --save
$ npm install multer --save
Ví dụ ứng dụng Helloworld trong Node.js
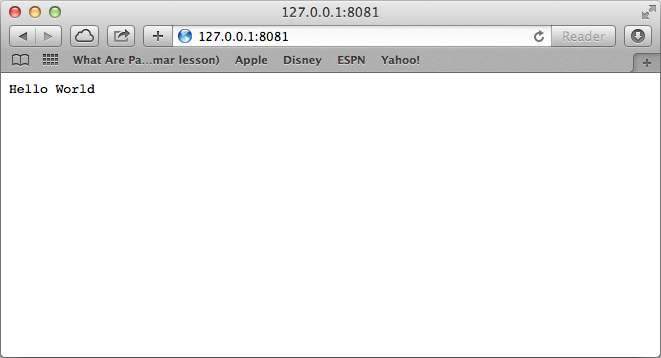
Dưới đây là một ví dụ rất cơ bản của Express minh họa cách bật Server và lắng nghe các kết nối trên cổng 3000. Ứng dụng này trả về Hello World! cho các requests đến trang chủ. Đối với các đường dẫn khác, nó sẽ trả về một 404 Not Found.
Tạo server.js có nội dung sau:
var express = require('express');
var app = express();

app.get('/', function (req, res) {
   res.send('Hello World');
})

var server = app.listen(8081, function () {
   var host = server.address().address
   var port = server.address().port

   console.log("Example app listening at http://%s:%s", host, port)
})
Chạy server.js để xem kết quả.
$ node server.jsBạn sẽ thấy kết quả hiện ra:
Ung dung Node.js dang lang nghe tai dia chi: http://0.0.0.0:8081Mở http://127.0.0.1:8081/ trong bất kỳ trình duyệt nào và xem kết quả.
Đối tượng Request & Response trong Node.js
Ứng dụng Express sử dụng một hàm callback có các tham số là các đối tượng request và response.
app.get('/', function (req, res) { // -- })Bạn có thể tham khảo chi tiết về 2 đối tượng này dưới đây:
- Đối tượng Request - Đối tượng này biểu diễn một HTTP request và có các thuộc tính cho các request như các chuỗi truy vấn, tham số, body, HTTP header và những phần khác.
- Đối tượng Response - Đối tượng này biểu diễn HTTP response được ứng dụng Express gửi đi khi nó nhận về một HTTP request.
Bạn có thể in ra các đối tượng req và res để cung cấp một lượng lớn thông tin liên quan đến HTTP request và trả về các cookie, session, URL …
Định tuyến cơ bản
Ở trên, bạn vừa theo dõi một ứng dụng cơ bản mà Server HTTP request đến một trang chủ. Định tuyến liên quan đến cách xác định một ứng dụng trả về cho một Client Request đến một Endpoint cụ thể, đó là một đường dẫn URI và trả về một phương thức HTTP request (GET, POST và các phương thức khác).
Dựa vào chương trình Hello World trên, mình sẽ phát triển thêm một số chức năng bổ sung để xử lý các HTTP request.
var express = require('express');
var app = express();

// This responds with "Hello World" on the homepage
app.get('/', function (req, res) {
   console.log("Got a GET request for the homepage");
   res.send('Hello GET');
})

// This responds a POST request for the homepage
app.post('/', function (req, res) {
   console.log("Got a POST request for the homepage");
   res.send('Hello POST');
})

// This responds a DELETE request for the /del_user page.
app.delete('/del_user', function (req, res) {
   console.log("Got a DELETE request for /del_user");
   res.send('Hello DELETE');
})

// This responds a GET request for the /list_user page.
app.get('/list_user', function (req, res) {
   console.log("Got a GET request for /list_user");
   res.send('Page Listing');
})

// This responds a GET request for abcd, abxcd, ab123cd, and so on
app.get('/ab*cd', function(req, res) {
   console.log("Got a GET request for /ab*cd");
   res.send('Page Pattern Match');
})

var server = app.listen(8081, function () {
   var host = server.address().address
   var port = server.address().port

   console.log("Example app listening at http://%s:%s", host, port)
})
Lưu phần code trong server.js và chạy file này với lệnh sau:
$ node server.jsKiểm tra kết quả:
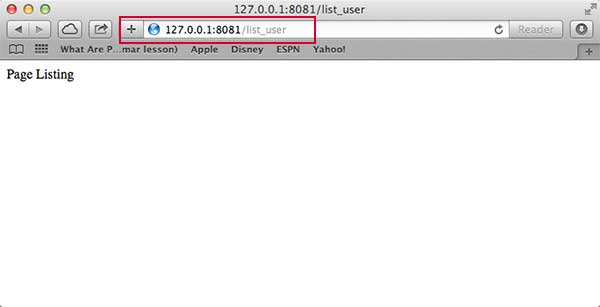
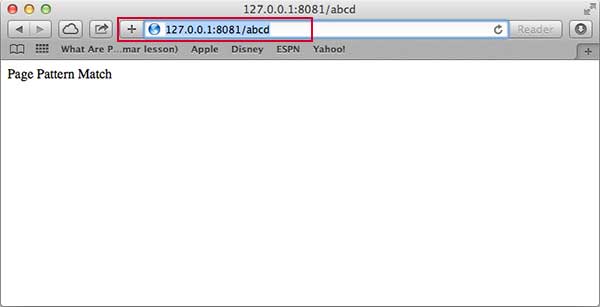
Example app listening at http://0.0.0.0:8081Bây giờ, bạn có thể thử các Request khác tại địa chỉ http://127.0.0.1:8081 để xem kết quả tạo bởi server.js. Dưới đây là vài màn hình hiển thị các response khác nhau với các URL khác nhau.
Màn hình kết quả cho http://127.0.0.1:8081/list_user
Màn hình kết quả cho http://127.0.0.1:8081/abcd
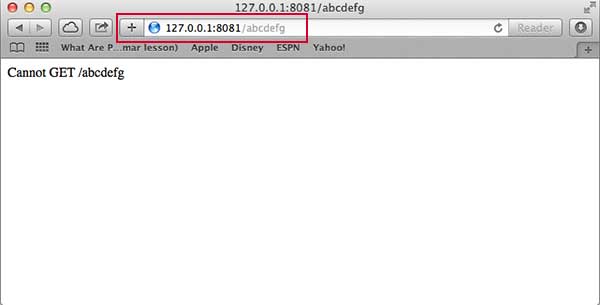
Màn hình kết quả cho http://127.0.0.1:8081/abcdefg
Đối với các File tĩnh
Express cung cấp các tiện ích lớp trung gian express.static để phục vụ cho các file tĩnh như hình ảnh, CSS, Javascript, ...
Về cơ bản, bạn chỉ cần truyền tên thư mục nơi bạn giữ các file này, express.static sẽ sử dụng file đó một cách trực tiếp. Ví dụ, bạn muốn giữ hình ảnh, CSS và Javascript trong thư mục public, bạn có thể làm như sau:
app.use(express.static('public'));Giả sử mình giữ một vài hình ảnh trong thư mục con public/images như sau:
node_modules
server.js
public/
public/images
public/images/logo.png
Sửa đổi ứng dụng "Hello Word" trên để thêm một số tính năng bổ sung để xử lý các file tĩnh:
var express = require('express');
var app = express();

app.use(express.static('public'));

app.get('/', function (req, res) {
   res.send('Hello World');
})

var server = app.listen(8081, function () {
   var host = server.address().address
   var port = server.address().port

   console.log("Example app listening at http://%s:%s", host, port)
})
Lưu phần code trong server.js và chạy file này với lệnh sau:
$ node server.jsBây giờ mở trình duyệt và gõ địa chỉ http://127.0.0.1:8081/images/logo.png để xem kết quả.
Ví dụ phương thức GET
Dưới đây là một ví dụ đơn giản để truyền 2 giá trị sử dụng HTML FORM với phương thức GET. Mình sẽ sử dụng process_get trong server.js để xử lí phần input.
<html>
   <body>

      <form action = "http://127.0.0.1:8081/process_get" method = "GET">
         First Name: <input type = "text" name = "first_name">  <br>
         Last Name: <input type = "text" name = "last_name">
         <input type = "submit" value = "Submit">
      </form>

   </body>
</html>
Lưu đoạn code trên trong index.htm và sửa đổi server.js như sau.
var express = require('express');
var app = express();

app.use(express.static('public'));
app.get('/index.htm', function (req, res) {
   res.sendFile( __dirname + "/" + "index.htm" );
})

app.get('/process_get', function (req, res) {
   // Prepare output in JSON format
   response = {
      first_name:req.query.first_name,
      last_name:req.query.last_name
   };
   console.log(response);
   res.end(JSON.stringify(response));
})

var server = app.listen(8081, function () {
   var host = server.address().address
   var port = server.address().port

   console.log("Example app listening at http://%s:%s", host, port)
})
Mở trình duyệt và gõ địa chỉ http://127.0.0.1:8081/index.htm để xem kết quả:
{"first_name":"John","last_name":"Paul"}Ví dụ phương thức POST
Dưới đây là ví dụ cơ bản để truyền 2 giá trị sử dụng HTML form bởi sử dụng phương thức POST. Mình sẽ sử dụng process_post trong server.js để xử lí phần input này.
<html>
   <body>

      <form action = "http://127.0.0.1:8081/process_post" method = "POST">
         First Name: <input type = "text" name = "first_name"> <br>
         Last Name: <input type = "text" name = "last_name">
         <input type = "submit" value = "Submit">
      </form>

   </body>
</html>
Lưu đoạn code trên trong index.htm và sửa đổi server.js như sau:
var express = require('express');
var app = express();
var bodyParser = require('body-parser');

// Create application/x-www-form-urlencoded parser
var urlencodedParser = bodyParser.urlencoded({ extended: false })

app.use(express.static('public'));
app.get('/index.htm', function (req, res) {
   res.sendFile( __dirname + "/" + "index.htm" );
})

app.post('/process_post', urlencodedParser, function (req, res) {
   // Prepare output in JSON format
   response = {
      first_name:req.body.first_name,
      last_name:req.body.last_name
   };
   console.log(response);
   res.end(JSON.stringify(response));
})

var server = app.listen(8081, function () {
   var host = server.address().address
   var port = server.address().port

   console.log("Example app listening at http://%s:%s", host, port)
})
Mở trình duyệt và gõ địa chỉ http://127.0.0.1:8081/index.htm để xem kết quả:
{"first_name":"John","last_name":"Paul"}Ví dụ File Upload
Dưới đây là HTML code để tạo một File Upload Form. Form này có những thuộc tính thiết lập đến phương thức POST và thuộc tính mã hóa để thiết lập multipart/form-data.
<html>
   <head>
      <title>File Uploading Form</title>
   </head>

   <body>
      <h3>File Upload:</h3>
      Select a file to upload: <br />

      <form action = "http://127.0.0.1:8081/file_upload" method = "POST"
         enctype = "multipart/form-data">
         <input type="file" name="file" size="50" />
         <br />
         <input type = "submit" value = "Upload File" />
      </form>

   </body>
</html>
Lưu đoạn code trên trong index.htm và sửa đổi server.js như sau:
var express = require('express');
var app = express();
var fs = require("fs");

var bodyParser = require('body-parser');
var multer  = require('multer');

app.use(express.static('public'));
app.use(bodyParser.urlencoded({ extended: false }));
app.use(multer({ dest: '/tmp/'}));

app.get('/index.htm', function (req, res) {
   res.sendFile( __dirname + "/" + "index.htm" );
})

app.post('/file_upload', function (req, res) {
   console.log(req.files.file.name);
   console.log(req.files.file.path);
   console.log(req.files.file.type);
   var file = __dirname + "/" + req.files.file.name;

   fs.readFile( req.files.file.path, function (err, data) {
      fs.writeFile(file, data, function (err) {
         if( err ) {
            console.log( err );
            } else {
               response = {
                  message:'File uploaded successfully',
                  filename:req.files.file.name
               };
            }

         console.log( response );
         res.end( JSON.stringify( response ) );
      });
   });
})

var server = app.listen(8081, function () {
   var host = server.address().address
   var port = server.address().port

   console.log("Example app listening at http://%s:%s", host, port)
})
Bây giờ bạn mở trình duyệt và gõ địa chỉ http://127.0.0.1:8081/index.htm để xem kết quả:
Ví dụ quản lý Cookie
Bạn có thể gửi các Cookie tới Node.js Server. Ví dụ dưới đây minh họa cách in tất cả Cookie được gửi bởi Client.
var express      = require('express')
var cookieParser = require('cookie-parser')

var app = express()
app.use(cookieParser())

app.get('/', function(req, res) {
   console.log("Cookies: ", req.cookies)
})
app.listen(8081)
Theo dõi VnCoder trên Facebook, để cập nhật những bài viết, tin tức và khoá học mới nhất!
- Bài 1: Node.js - Giới Thiệu
- Bài 2: Nodejs - Khởi tạo server
- Bài 3: NodeJS - REPL Terminal
- Bài 4: NodeJS - NPM
- Bài 5: NodeJS - Khái niệm callbacks
- Bài 6: Nodejs - Sự kiện lặp
- Bài 7: NodeJS - Sự kiện Emitter
- Bài 8: NodeJs - Buffer
- Bài 9: NodeJS - Streams
- Bài 10: NodeJS - Đọc ghi File
- Bài 11: NodeJS - Biến toàn cục
- Bài 12: NodeJS - Utility Module
- Bài 13: NodeJS - Web Module
- Bài 14: NodeJS - Express Framework
- Bài 15: NodeJS - RESTful API
- Bài 16: NodeJS - Request
- Bài 17: NodeJS - Response
- Bài 18: NodeJS - Scaling Ứng dụng
- Bài 19: NodeJS - Package

