Cách tạo một widget (tiện ích) cho ứng dụng Android
Trong quá bài viết này, ta sẽ tìm hiểu cách tạo một widget cơ bản, cách giao tiếp dữ liệu với widget thông qua thiết lập một ứng dụng cơ bản hiển thị số lần nhấp trong một activity và số lần nhấp sẽ tiếp tục tăng bất cứ khi nào bạn nhấn vào tiện ích của ứng dụng.
1. Cài đặt bố cục
Thiết lập bố cục cơ bản
Trước hết chúng ta sẽ thiết lập main activity và layout của nó. Activity này sẽ không có gì để làm việc với các widget cả.
activity_main.xml
<?xml version="1.0" encoding="utf-8"?>
<LinearLayout xmlns:android="http://schemas.android.com/apk/res/android"
    xmlns:app="http://schemas.android.com/apk/res-auto"
    xmlns:tools="http://schemas.android.com/tools"
    android:layout_width="match_parent"
    android:layout_height="match_parent"
    android:gravity="center"
    android:orientation="vertical"
    tools:context=".MainActivity">

    <TextView
        android:layout_width="wrap_content"
        android:layout_height="wrap_content"
        android:text="Clicks"
        android:textSize="24dp" />

    <TextView
        android:id="@+id/clicksTextView"
        android:layout_width="wrap_content"
        android:layout_height="wrap_content"
        android:text="0"
        android:textSize="40dp"
        android:textStyle="bold" />

</LinearLayout>
MainActivity.java
public class MainActivity extends AppCompatActivity {

    @Override
    protected void onCreate(Bundle savedInstanceState) {
        super.onCreate(savedInstanceState);
        setContentView(R.layout.activity_main);
    }

    @Override
    protected void onResume() {
        super.onResume();
        int clicks = getSharedPreferences("sp", MODE_PRIVATE).getInt("clicks", 0);
        ((TextView) findViewById(R.id.clicksTextView)).setText(String.valueOf(clicks));
    }
}
Trong main activity, bạn sẽ trích xuất số lần nhấp được lưu trữ trong SharedPreferences.
Giao diện widget
Bây giờ ta sẽ thiết lập layout cho widget . Trong Android Studio đã cung cấp một giao diện có sẵn cho ta sử dụng:
Nhấp chuột phải vào res -> Mới -> Widget -> App Widget.
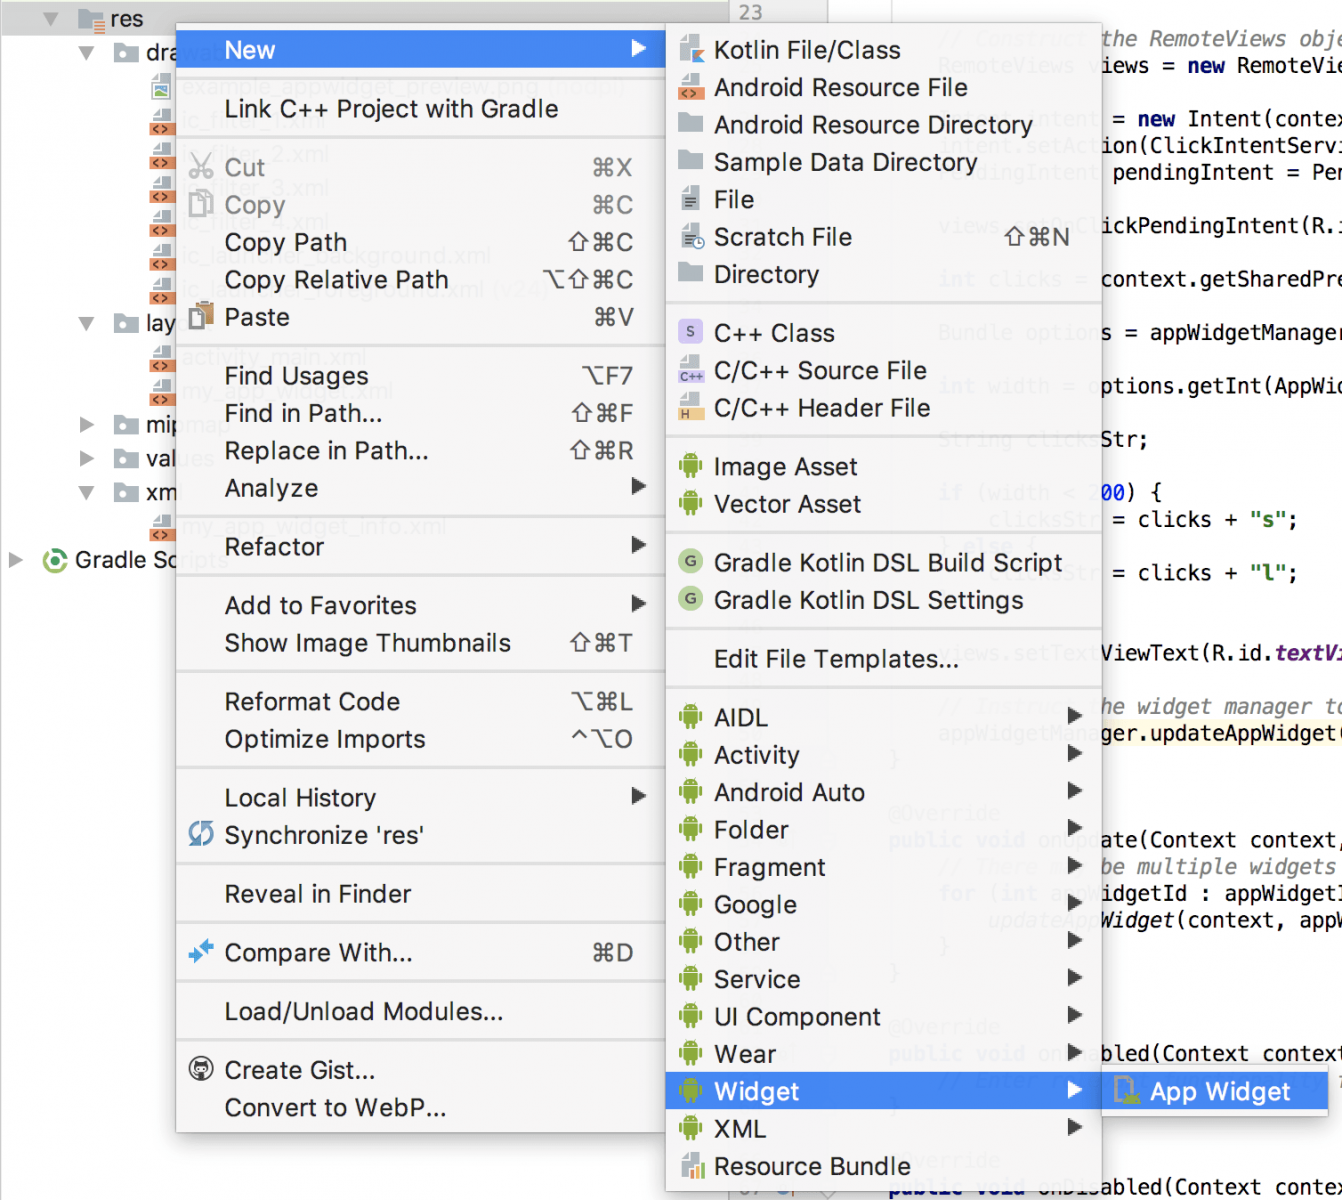
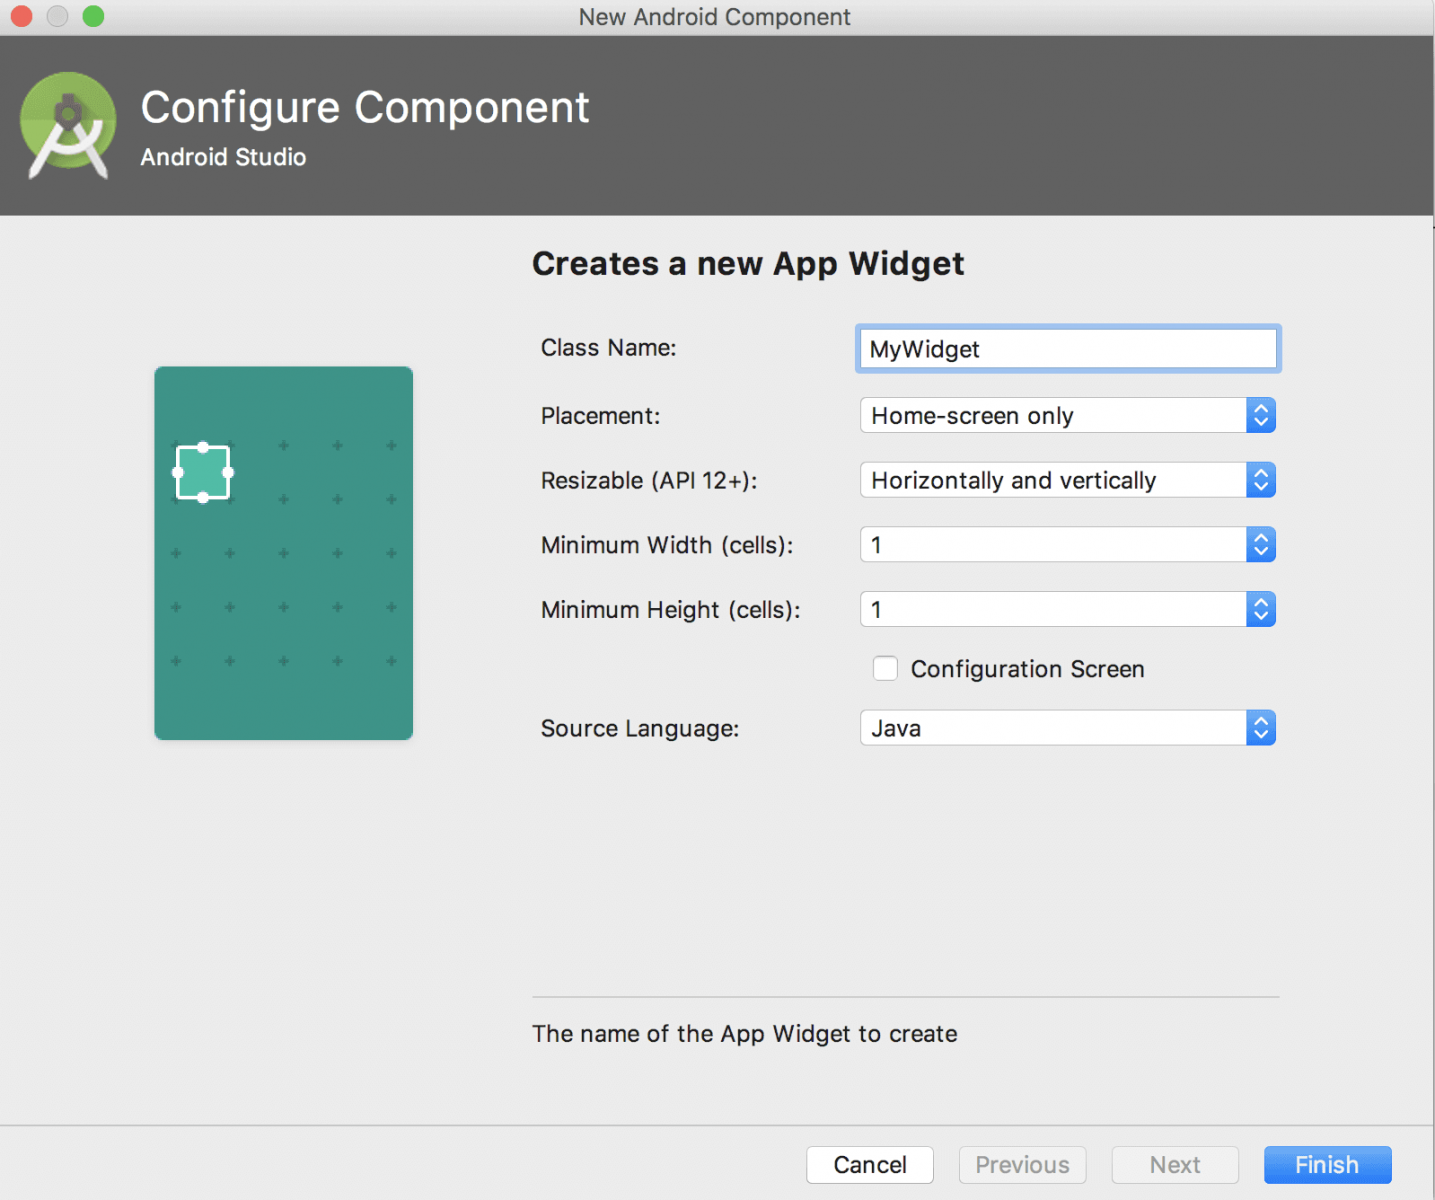

Bây giờ Android Studio sẽ tạo 3 tệp cho bạn.
- MyAppWidget.java - Tệp java chứa triển khai AppWidget, mọi logic của widget sẽ được thêm ở đây.
- my_app_widget.xml - Tệp xml bố cục thông thường (nhưng có chức năng giới hạn) cho tiện ích của bạn.
- my_app_widget_info.xml - Đây là tệp xml chứa các thuộc tính khác nhau cho tiện ích của bạn như thời gian làm mới, hình ảnh xem trước, chiều cao tối thiểu và tiện ích con
public class MyAppWidget extends AppWidgetProvider {

    static void updateAppWidget(Context context, AppWidgetManager appWidgetManager,
                                int appWidgetId) {

        CharSequence widgetText = context.getString(R.string.appwidget_text);
        // Construct the RemoteViews object
        RemoteViews views = new RemoteViews(context.getPackageName(), R.layout.custom_widget);
        views.setTextViewText(R.id.appwidget_text, widgetText);

        // Instruct the widget manager to update the widget
        appWidgetManager.updateAppWidget(appWidgetId, views);
    }

    @Override
    public void onUpdate(Context context, AppWidgetManager appWidgetManager, int[] appWidgetIds) {
        // There may be multiple widgets active, so update all of them
        for (int appWidgetId : appWidgetIds) {
            updateAppWidget(context, appWidgetManager, appWidgetId);
        }
    }

    @Override
    public void onEnabled(Context context) {
        // Enter relevant functionality for when the first widget is created
    }

    @Override
    public void onDisabled(Context context) {
        // Enter relevant functionality for when the last widget is disabled
    }
}
Đây là mã mặc định trong lớp MyAppWidget.java . Bạn sẽ được cung cấp 3 chức năng theo mặc định.Xóa hết code trong hàm updateAppWidget, code của ta sẽ trong như sau:
public class MyAppWidget extends AppWidgetProvider {

    static void updateAppWidget(Context context, AppWidgetManager appWidgetManager,
                                int appWidgetId) {
    }

    @Override
    public void onUpdate(Context context, AppWidgetManager appWidgetManager, int[] appWidgetIds) {
        // There may be multiple widgets active, so update all of them
        for (int appWidgetId : appWidgetIds) {
            updateAppWidget(context, appWidgetManager, appWidgetId);
        }
    }

    @Override
    public void onEnabled(Context context) {
        // Enter relevant functionality for when the first widget is created
    }

    @Override
    public void onDisabled(Context context) {
        // Enter relevant functionality for when the last widget is disabled
    }
}
Đây là mã mặc định từ tệp layout my_app_widget.xml :
<RelativeLayout xmlns:android="http://schemas.android.com/apk/res/android"
    android:layout_width="match_parent"
    android:layout_height="match_parent"
    android:background="#09C"
    android:padding="@dimen/widget_margin">

    <TextView
        android:id="@+id/appwidget_text"
        android:layout_width="wrap_content"
        android:layout_height="wrap_content"
        android:layout_centerHorizontal="true"
        android:layout_centerVertical="true"
        android:layout_margin="8dp"
        android:background="#09C"
        android:contentDescription="@string/appwidget_text"
        android:text="@string/appwidget_text"
        android:textColor="#ffffff"
        android:textSize="24sp"
        android:textStyle="bold|italic" />

</RelativeLayout>
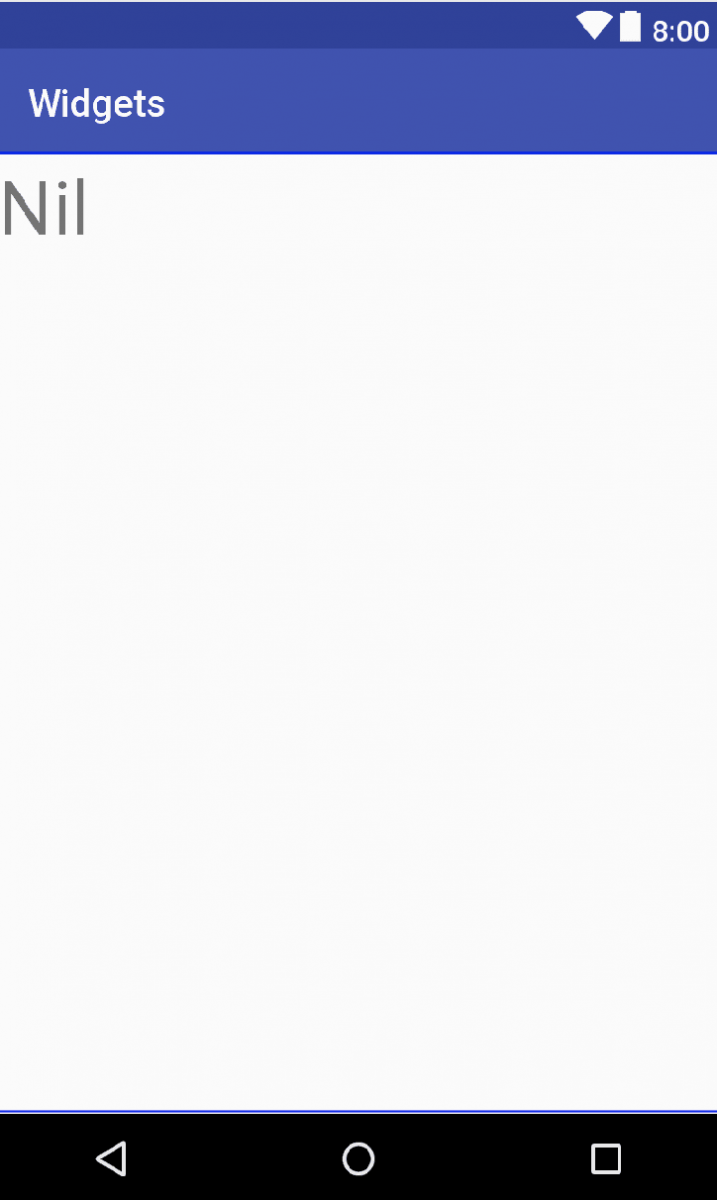
Thay thế layout ban đầu bằng layout bên dưới giúp layout của chúng ta đơn giản hơn
my_app_widget.xml
<RelativeLayout xmlns:android="http://schemas.android.com/apk/res/android"
    android:layout_width="match_parent"
    android:layout_height="match_parent"
    android:padding="@dimen/widget_margin">

    <TextView
        android:id="@+id/textView"
        android:layout_width="match_parent"
        android:layout_height="match_parent"
        android:textSize="40sp"
        android:text="Nil" />

</RelativeLayout>
Nó sẽ trông giống như thế này:
Bây giờ hãy xem my_app_widget_info.xml .
my_app_widget_info.xml:
<?xml version="1.0" encoding="utf-8"?>
<appwidget-provider xmlns:android="http://schemas.android.com/apk/res/android"
    android:initialKeyguardLayout="@layout/my_app_widget"
    android:initialLayout="@layout/my_app_widget"
    android:minHeight="40dp"
    android:minWidth="40dp"
    android:previewImage="@drawable/example_appwidget_preview"
    android:resizeMode="horizontal|vertical"
    android:updatePeriodMillis="86400000"
    android:widgetCategory="home_screen"></appwidget-provider>
Tệp này giống như một siêu dữ liệu cho widget của bạn. Dưới đây là một số thuộc tính:
- minHeight & mingWidth - Chiều cao và chiều rộng tối thiểu cho tiện ích của bạn, khi người dùng đặt tiện ích của bạn trên màn hình chính, nó không thể thay đổi kích thước thành kích thước nhỏ hơn kích thước này.
- previewImage - Đây là hình ảnh xem trước mà người dùng nhìn thấy khi duyệt trong ngăn kéo ứng dụng.
- resizeMode - Người dùng có thể thay đổi kích thước widget theo chiều dọc và chiều ngang hay không.
- updatePeriodMillis - Khoảng thời gian giữa các widget được cập nhật bằng cách gọi hàm onUpdate .
Thay đổi updatePeriodMillis thành 30 phút.
my_app_widget.xml
<?xml version="1.0" encoding="utf-8"?>
<appwidget-provider xmlns:android="http://schemas.android.com/apk/res/android"
    android:initialKeyguardLayout="@layout/my_app_widget"
    android:initialLayout="@layout/my_app_widget"
    android:minHeight="40dp"
    android:minWidth="40dp"
    android:previewImage="@drawable/ic_filter_1"
    android:resizeMode="horizontal|vertical"
    android:updatePeriodMillis="1800000"
    android:widgetCategory="home_screen">

</appwidget-provider>
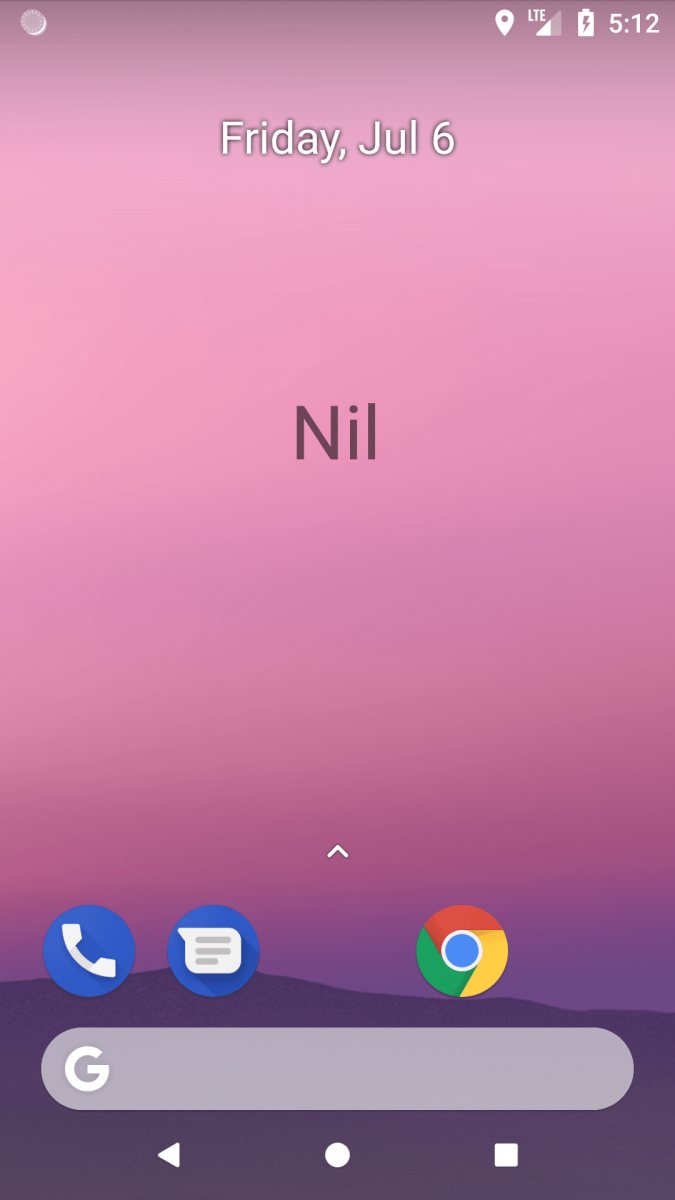
Bây giờ nếu bạn nhìn vào ngăn kéo ứng dụng tiện ích điện thoại, bạn sẽ thấy tiện ích này hiển thị và bạn có thể đặt nó ở bất cứ đâu bạn muốn.
2. Thêm tương tác
Bây giờ bạn sẽ thiết lập tiện ích để mở MainActivity
Trước tiên, ta sẽ phải tạo một RemoteView , cho phép chúng ta truy cập để thêm tương tác vào widget.
public class ClickIntentService extends IntentService {
    public static final String ACTION_CLICK = "com.thetehnocafe.gurleensethi.widgets.click";

    public ClickIntentService() {
        super("ClickIntentService");
    }

    @Override
    protected void onHandleIntent(Intent intent) {
        if (intent != null) {
            final String action = intent.getAction();

            if (ACTION_CLICK.equals(action)) {
                handleClick();
            }
        }
    }

    private void handleClick() {
        int clicks = getSharedPreferences("sp", MODE_PRIVATE).getInt("clicks", 0);
        clicks++;
        getSharedPreferences("sp", MODE_PRIVATE)
                .edit()
                .putInt("clicks", clicks)
                .commit();
    }
}
Trình nghe với RemoteView không giống như các View bình thường.
Trước tiên, bạn tạo Pending Intent để khởi chạy Activity. Sau đó, tạo new RemoteView cho widget layout và sử dụng phương thức setOnClickPendingIntent để đăng ký ý định cho TextView (vì vậy bất cứ khi nào người dùng nhấp vào TextView, Intent này sẽ được kích hoạt).
Cuối cùng cập nhật widget bằng cách gọi updateAppWidget trên AppWidgetManager . Bây giờ nếu bạn nhấp vào widget MainActivity sẽ khởi chạy.
Tăng số lượng khi nhấp vào widget
Tạo một IntentService có tên ClickIntentService .
ClickIntentService.java
public class ClickIntentService extends IntentService {
    public static final String ACTION_CLICK = "com.thetehnocafe.gurleensethi.widgets.click";

    public ClickIntentService() {
        super("ClickIntentService");
    }

    @Override
    protected void onHandleIntent(Intent intent) {
        if (intent != null) {
            final String action = intent.getAction();

            if (ACTION_CLICK.equals(action)) {
                handleClick();
            }
        }
    }

    private void handleClick() {
        int clicks = getSharedPreferences("sp", MODE_PRIVATE).getInt("clicks", 0);
        clicks++;
        getSharedPreferences("sp", MODE_PRIVATE)
                .edit()
                .putInt("clicks", clicks)
                .commit();
    }
}
Những gì đang xảy ra trong Service này về cơ bản là bất cứ khi nào nó được khởi động, nó sẽ tăng số lượng trong SharedPreference. Bây giờ, hãy làm cho TextView bắt đầu chạy service.
MyAppWidget.java
public class MyAppWidget extends AppWidgetProvider {

    static void updateAppWidget(Context context, AppWidgetManager appWidgetManager,
                                int appWidgetId) {

        // Construct the RemoteViews object
        RemoteViews views = new RemoteViews(context.getPackageName(), R.layout.my_app_widget);

        Intent intent = new Intent(context, ClickIntentService.class);
        intent.setAction(ClickIntentService.ACTION_CLICK);
        PendingIntent pendingIntent = PendingIntent.getService(context, 0, intent, PendingIntent.FLAG_UPDATE_CURRENT);

        views.setOnClickPendingIntent(R.id.textView, pendingIntent);

        int clicks = context.getSharedPreferences("sp", MODE_PRIVATE).getInt("clicks", 0);

        views.setTextViewText(R.id.textView, String.valueOf(clicks));

        // Instruct the widget manager to update the widget
        appWidgetManager.updateAppWidget(appWidgetId, views);
    }

    @Override
    public void onUpdate(Context context, AppWidgetManager appWidgetManager, int[] appWidgetIds) {
        // There may be multiple widgets active, so update all of them
        for (int appWidgetId : appWidgetIds) {
            updateAppWidget(context, appWidgetManager, appWidgetId);
        }
    }

    @Override
    public void onEnabled(Context context) {
        // Enter relevant functionality for when the first widget is created
    }

    @Override
    public void onDisabled(Context context) {
        // Enter relevant functionality for when the last widget is disabled
    }
}
Ta đã thay đổi PendingIntent từ getActivity thành getService
Cách cập nhật văn bản trong RemoteView là khác nhau. Nếu ta chạy ứng dụng này, ta sẽ thấy rằng số lần nhấp tăng lên nhưng chúng không cập nhật ngay lập tức trong widget. Bạn có thể xác minh điều này bằng cách mở ứng dụng và xem số lần nhấp.
Chúng ta sửa lỗi này bằng cách mỗi khi ta tăng bộ đếm trong IntentService, ta cần thông báo cho widget để cập nhật dữ liệu.
ClickIntentService.java
public class ClickIntentService extends IntentService {

    public static final String ACTION_CLICK = "com.thetehnocafe.gurleensethi.widgets.click";

    public ClickIntentService() {
        super("ClickIntentService");
    }

    @Override
    protected void onHandleIntent(Intent intent) {
        if (intent != null) {
            final String action = intent.getAction();

            if (ACTION_CLICK.equals(action)) {
                handleClick();
            }
        }
    }

    private void handleClick() {
        int clicks = getSharedPreferences("sp", MODE_PRIVATE).getInt("clicks", 0);
        clicks++;
        getSharedPreferences("sp", MODE_PRIVATE)
                .edit()
                .putInt("clicks", clicks)
                .commit();

        AppWidgetManager appWidgetManager = AppWidgetManager.getInstance(this);
        int[] widgetIds = appWidgetManager.getAppWidgetIds(new ComponentName(this, MyAppWidget.class));
        for (int appWidgetId : widgetIds) {
            MyAppWidget.updateAppWidget(getApplicationContext(), appWidgetManager, appWidgetId);
        }
    }
}
Ta lấy instances của AppWidgetManager, lấy tất cả id của widget MyAppWidget và gọi hàm updateAppWidget trên đó.
Chạy ứng dụng và xem kết quả đạt được
Theo dõi VnCoder trên Facebook, để cập nhật những bài viết, tin tức và khoá học mới nhất!