Cách tạo bố cục hai khung cho máy tính bảng hoặc khi xoay ngang thiết bị di động (dual pane layout in Android) sử dụng Fragment trong Android (Phần 1)
Trong hướng dẫn này, bạn sẽ tìm hiểu cách tạo bố cục hai khung trong Android (dual pane layout in Android). Thiết kế này giúp ứng dụng trên điện thoại hoặc máy tính bảng nhìn sẽ đẹp mắt hơn, một trong những mẫu thiết kế thường được sử dụng khi trên máy tính bảng là two pane.

Trong hướng dẫn này, ta sẽ code một ứng dụng có 2 giao diện khác nhau trên 2 thiết bị khác nhau là thiết bị di động và máy tính bảng. Mã hoàn chỉnh có sẵn trên GitHub Repo này
- Giao diện trên thiết bị di động
- Giao diện trên máy tính bảng

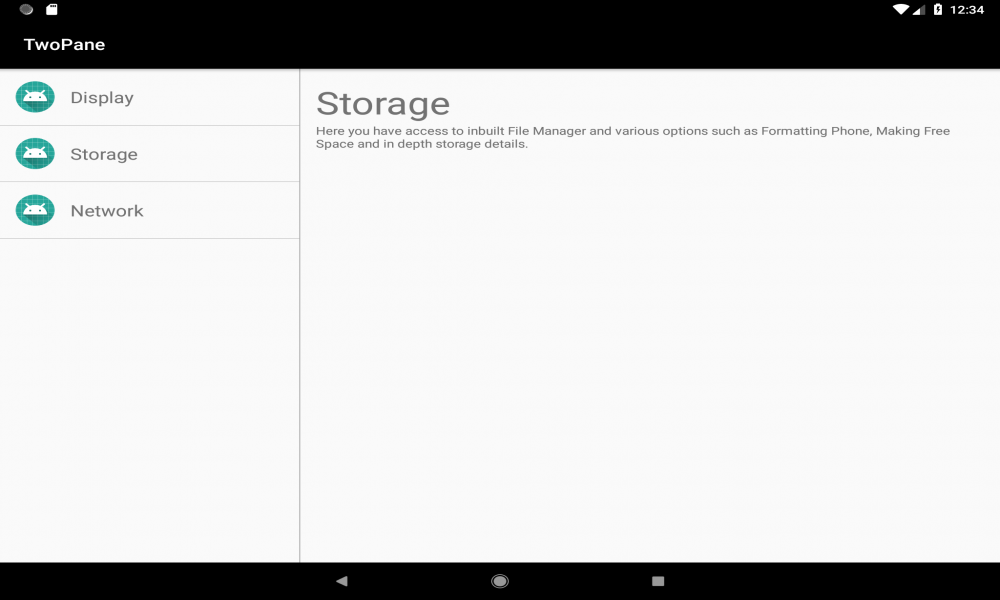
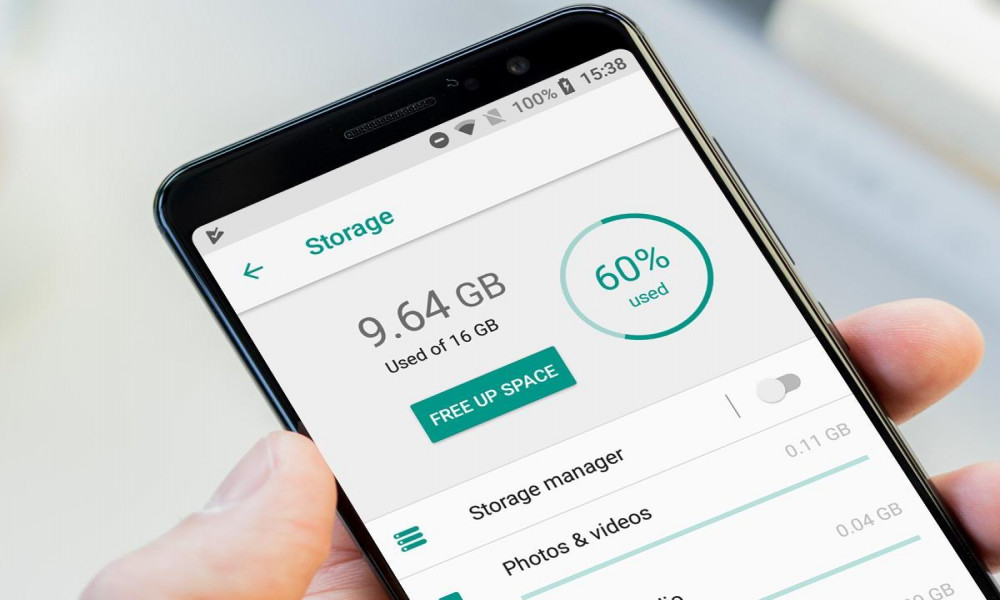
Bạn sẽ phát triển một ứng dụng mô phỏng cài đặt có 3 tùy chọn “Network”, “Storage” and “Display”. Trên điện thoại bình thường, bạn sẽ hiển thị danh sách các tùy chọn này, khi click vào từng tùy chọn sẽ hiển thị nội dung chi tiết cho tùy chọn đó.
Trên máy tính bảng, bạn sẽ hiển thị bố cục hai khung trong đó khi nhấp vào tùy chọn trong khung bên trái sẽ cập nhật nội dung trong khung bên phải.
Đầu tiên bạn sẽ phát triển bố cục cho thiết bị di động và sau đó bạn sẽ điều chỉnh nó để thích ứng trên máy tính bảng.
1. Thiết lập
Tạo một dự án Android Studio mới. Bây giờ bạn có file MainActivity.java và activity_main.xml
main_activity.xml
<?xml version="1.0" encoding="utf-8"?>
<FrameLayout xmlns:android="http://schemas.android.com/apk/res/android"
xmlns:app="http://schemas.android.com/apk/res-auto"
xmlns:tools="http://schemas.android.com/tools"
android:id="@+id/container"
android:layout_width="match_parent"
android:layout_height="match_parent"
tools:context=".MainActivity">

</FrameLayout>
2. Tạo layout chứa các tùy chọn
Tạo một tệp mới có tên fragment_sinstall_options_view.xml . Đây sẽ là tệp layout của chúng ta cho 3 tùy chọn cài đặt.
<?xml version="1.0" encoding="utf-8"?>
<ScrollView xmlns:android="http://schemas.android.com/apk/res/android"
    android:layout_width="match_parent"
    android:layout_height="match_parent"
    android:orientation="vertical">

    <LinearLayout
        android:layout_width="match_parent"
        android:layout_height="wrap_content"
        android:orientation="vertical">

        <LinearLayout
            android:id="@+id/displayOption"
            android:layout_width="match_parent"
            android:layout_height="wrap_content"
            android:background="?selectableItemBackground"
            android:clickable="true"
            android:focusable="true"
            android:gravity="center_vertical"
            android:orientation="horizontal"
            android:padding="16dp">

            <ImageView
                android:layout_width="40dp"
                android:layout_height="40dp"
                android:src="@mipmap/ic_launcher" />

            <TextView
                android:layout_width="wrap_content"
                android:layout_height="wrap_content"
                android:layout_marginLeft="16dp"
                android:layout_marginStart="16dp"
                android:text="@string/display"
                android:textSize="20sp" />

        </LinearLayout>

        <View
            android:layout_width="match_parent"
            android:layout_height="0.5dp"
            android:background="@android:color/darker_gray" />

        <LinearLayout
            android:id="@+id/storageOption"
            android:layout_width="match_parent"
            android:layout_height="wrap_content"
            android:background="?selectableItemBackground"
            android:clickable="true"
            android:focusable="true"
            android:gravity="center_vertical"
            android:orientation="horizontal"
            android:padding="16dp">

            <ImageView
                android:layout_width="40dp"
                android:layout_height="40dp"
                android:src="@mipmap/ic_launcher" />

            <TextView
                android:layout_width="wrap_content"
                android:layout_height="wrap_content"
                android:layout_marginLeft="16dp"
                android:layout_marginStart="16dp"
                android:text="@string/storage"
                android:textSize="20sp" />

        </LinearLayout>

        <View
            android:layout_width="match_parent"
            android:layout_height="0.5dp"
            android:background="@android:color/darker_gray" />


        <LinearLayout
            android:id="@+id/networkOption"
            android:layout_width="match_parent"
            android:layout_height="wrap_content"
            android:background="?selectableItemBackground"
            android:clickable="true"
            android:focusable="true"
            android:gravity="center_vertical"
            android:orientation="horizontal"
            android:padding="16dp">

            <ImageView
                android:layout_width="40dp"
                android:layout_height="40dp"
                android:src="@mipmap/ic_launcher" />

            <TextView
                android:layout_width="wrap_content"
                android:layout_height="wrap_content"
                android:layout_marginLeft="16dp"
                android:layout_marginStart="16dp"
                android:text="@string/network"
                android:textSize="20sp" />

        </LinearLayout>

        <View
            android:layout_width="match_parent"
            android:layout_height="0.5dp"
            android:background="@android:color/darker_gray" />

    </LinearLayout>

</ScrollView>
Bây giờ hãy tạo một lớp Fragment có tên là SetOptionsFragment
public class SettingOptionsFragment extends Fragment {

    @Override
    public void onAttach(Context context) {
        super.onAttach(context);
    }

    @Nullable
    @Override
    public View onCreateView(@NonNull LayoutInflater inflater, @Nullable ViewGroup container, @Nullable Bundle savedInstanceState) {
        View rootView = inflater.inflate(R.layout.fragment_settings_options_view, container, false);

        return rootView;
    }
}
Trong MainActivity
public class MainActivity extends AppCompatActivity {
    private FragmentManager fragmentManager;

    protected void onCreate(Bundle savedInstanceState) {
        super.onCreate(savedInstanceState);
        setContentView(R.layout.activity_main);
        fragmentManager = getSupportFragmentManager();

        if (savedInstanceState == null) {
            fragmentManager.beginTransaction()
                    .add(R.id.container, new SettingOptionsFragment())
                    .commit();
        }
    }
}
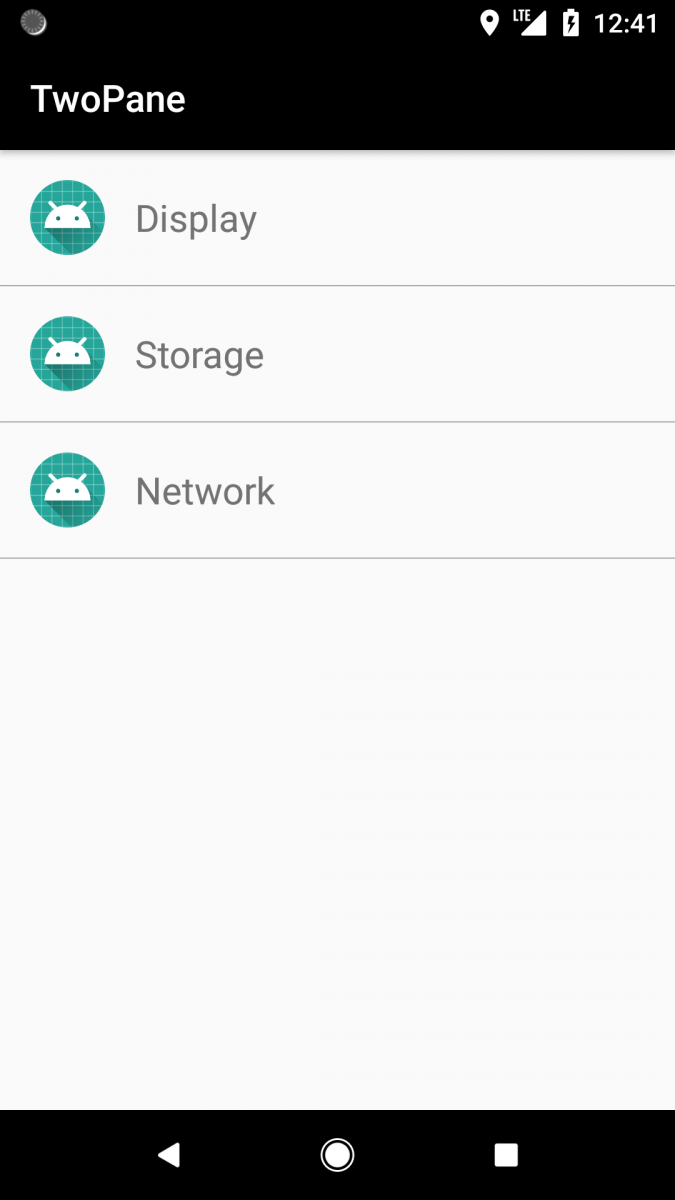
Bây giờ nếu bạn chạy ứng dụng, nó sẽ trông như thế này.

3. Tạo layout chi tiết
Tạo một Activity mới có tên SettingsDetailActivity. Dưới đây là layout của SettingsDetailActivity.
<?xml version="1.0" encoding="utf-8"?>
<FrameLayout xmlns:android="http://schemas.android.com/apk/res/android"
    xmlns:app="http://schemas.android.com/apk/res-auto"
    xmlns:tools="http://schemas.android.com/tools"
    android:id="@+id/settingsContainer"
    android:layout_width="match_parent"
    android:layout_height="match_parent"
    tools:context=".SettingDetailsActivity">

</FrameLayout>
Bây giờ hãy tạo ba fragment cho mỗi tùy chọn “network”, “display” and “storage”.
Network Settings
fragment_network_sinstall.xml
<?xml version="1.0" encoding="utf-8"?>
<LinearLayout xmlns:android="http://schemas.android.com/apk/res/android"
    android:layout_width="match_parent"
    android:layout_height="match_parent"
    android:orientation="vertical"
    android:padding="16dp">

    <TextView
        android:layout_width="wrap_content"
        android:layout_height="wrap_content"
        android:text="@string/network"
        android:textSize="40sp" />

    <TextView
        android:layout_width="wrap_content"
        android:layout_height="wrap_content"
        android:text="@string/network_description"/>

</LinearLayout>
NetworkSettingsFragment
public class NetworkSettingsFragment extends Fragment {

    @Nullable
    @Override
    public View onCreateView(@NonNull LayoutInflater inflater, @Nullable ViewGroup container, @Nullable Bundle savedInstanceState) {
        View rootView = inflater.inflate(R.layout.fragment_network_settings, container, false);

        return rootView;
    }
}
Display Settings
fragment_display_settings.xml
<?xml version="1.0" encoding="utf-8"?>
<LinearLayout xmlns:android="http://schemas.android.com/apk/res/android"
    android:layout_width="match_parent"
    android:layout_height="match_parent"
    android:orientation="vertical"
    android:padding="16dp">

    <TextView
        android:layout_width="wrap_content"
        android:layout_height="wrap_content"
        android:text="@string/display"
        android:textSize="40sp" />

    <TextView
        android:layout_width="wrap_content"
        android:layout_height="wrap_content"
        android:text="@string/display_description"/>

</LinearLayout>
DisplaySettingsFragment
public class DisplaySettingsFragment extends Fragment {

    @Nullable
    @Override
    public View onCreateView(@NonNull LayoutInflater inflater, @Nullable ViewGroup container, @Nullable Bundle savedInstanceState) {
        View rootView = inflater.inflate(R.layout.fragment_display_settings, container, false);

        return rootView;
    }
}
Storage Settings
fragment_storage_settings.xml
<?xml version="1.0" encoding="utf-8"?>
<LinearLayout xmlns:android="http://schemas.android.com/apk/res/android"
    android:layout_width="match_parent"
    android:layout_height="match_parent"
    android:orientation="vertical"
    android:padding="16dp">

    <TextView
        android:layout_width="wrap_content"
        android:layout_height="wrap_content"
        android:text="@string/storage"
        android:textSize="40sp" />

    <TextView
        android:layout_width="wrap_content"
        android:layout_height="wrap_content"
        android:text="@string/storage_description"/>

</LinearLayout>
StorageSettingsFragment
public class StorageSettingsFragment extends Fragment {

    @Nullable
    @Override
    public View onCreateView(@NonNull LayoutInflater inflater, @Nullable ViewGroup container, @Nullable Bundle savedInstanceState) {
        View rootView = inflater.inflate(R.layout.fragment_storage_settings, container, false);

        return rootView;
    }
}
Giờ ta cần xác định người dùng click tùy chọn nào để hiển thị fragment tương ứng
4. Fragment- Activity
Quay lại MainActivity và SettingsOptionsFragment . Trong SetupOptionsFragment, bạn phải xác định tùy chọn nào mà người dùng đã click vào và thông báo cho MainActivity. Bạn sẽ làm điều này bằng cách sử dụng callbacks.
Cập nhật SettingOptionsFragment của bạn bằng cách thêm interface OnOptionClickListener có chứa phương thức onOptionSelected (String) .
public class SettingOptionsFragment extends Fragment {

    interface OnOptionClickListener {
        void onOptionSelected(String option);
    }

    private OnOptionClickListener mCallback;

    @Nullable
    @Override
    public View onCreateView(@NonNull LayoutInflater inflater, @Nullable ViewGroup container, @Nullable Bundle savedInstanceState) {
        View rootView = inflater.inflate(R.layout.fragment_settings_options_view, container, false);

        return rootView;
    }
}
MainActivity sẽ implement interface này.
public class MainActivity extends AppCompatActivity implements SettingOptionsFragment.OnOptionClickListener {

    private FragmentManager fragmentManager;

    @Override
    protected void onCreate(Bundle savedInstanceState) {
        super.onCreate(savedInstanceState);
        setContentView(R.layout.activity_main);
        fragmentManager = getSupportFragmentManager();

        if (savedInstanceState == null) {
            fragmentManager.beginTransaction()
                    .add(R.id.container, new SettingOptionsFragment())
                    .commit();
        }
    }

    @Override
    public void onOptionSelected(String option) {

    }
}
Bây giờ, SettingOptionsFragment cần phải có một instance cho MainActivity thực hiện OnOptionClickListener. Bạn có thể lấy Activity trong phương thức onAttach của fragment.
public class SettingOptionsFragment extends Fragment {

    interface OnOptionClickListener {
        void onOptionSelected(String option);
    }

    private OnOptionClickListener mCallback;

    @Override
    public void onAttach(Context context) {
        super.onAttach(context);

        try {
            mCallback = (OnOptionClickListener) context;
        } catch (Exception e) {
            throw new ClassCastException(context.toString() + " must implement SettingOptionsFragment.OnOptionClickListener");
        }
    }

    @Nullable
    @Override
    public View onCreateView(@NonNull LayoutInflater inflater, @Nullable ViewGroup container, @Nullable Bundle savedInstanceState) {
        View rootView = inflater.inflate(R.layout.fragment_settings_options_view, container, false);

        return rootView;
    }
}
Cho phép thêm click listener vào các tùy chọn và thông báo cho Activity về lần click.
public class SettingOptionsFragment extends Fragment {

    interface OnOptionClickListener {
        void onOptionSelected(String option);
    }

    private OnOptionClickListener mCallback;

    @Override
    public void onAttach(Context context) {
        super.onAttach(context);

        try {
            mCallback = (OnOptionClickListener) context;
        } catch (Exception e) {
            throw new ClassCastException(context.toString() + " must implement SettingOptionsFragment.OnOptionClickListener");
        }
    }

    @Nullable
    @Override
    public View onCreateView(@NonNull LayoutInflater inflater, @Nullable ViewGroup container, @Nullable Bundle savedInstanceState) {
        View rootView = inflater.inflate(R.layout.fragment_settings_options_view, container, false);

        LinearLayout mNetworkOption = rootView.findViewById(R.id.networkOption);
        LinearLayout mStorageOption = rootView.findViewById(R.id.storageOption);
        LinearLayout mDisplayOption = rootView.findViewById(R.id.displayOption);

        mNetworkOption.setOnClickListener(new View.OnClickListener() {
            @Override
            public void onClick(View v) {
                mCallback.onOptionSelected("network");
            }
        });

        mStorageOption.setOnClickListener(new View.OnClickListener() {
            @Override
            public void onClick(View v) {
                mCallback.onOptionSelected("storage");
            }
        });

        mDisplayOption.setOnClickListener(new View.OnClickListener() {
            @Override
            public void onClick(View v) {
                mCallback.onOptionSelected("display");
            }
        });

        return rootView;
    }
}
Trong MainActivity, tạo một Intent để chuyển đến SetupDetailsActivity.
MainActivity
public class SettingOptionsFragment extends Fragment {

    interface OnOptionClickListener {
        void onOptionSelected(String option);
    }

    private OnOptionClickListener mCallback;

    @Override
    public void onAttach(Context context) {
        super.onAttach(context);

        try {
            mCallback = (OnOptionClickListener) context;
        } catch (Exception e) {
            throw new ClassCastException(context.toString() + " must implement SettingOptionsFragment.OnOptionClickListener");
        }
    }

    @Nullable
    @Override
    public View onCreateView(@NonNull LayoutInflater inflater, @Nullable ViewGroup container, @Nullable Bundle savedInstanceState) {
        View rootView = inflater.inflate(R.layout.fragment_settings_options_view, container, false);

        LinearLayout mNetworkOption = rootView.findViewById(R.id.networkOption);
        LinearLayout mStorageOption = rootView.findViewById(R.id.storageOption);
        LinearLayout mDisplayOption = rootView.findViewById(R.id.displayOption);

        mNetworkOption.setOnClickListener(new View.OnClickListener() {
            @Override
            public void onClick(View v) {
                mCallback.onOptionSelected("network");
            }
        });

        mStorageOption.setOnClickListener(new View.OnClickListener() {
            @Override
            public void onClick(View v) {
                mCallback.onOptionSelected("storage");
            }
        });

        mDisplayOption.setOnClickListener(new View.OnClickListener() {
            @Override
            public void onClick(View v) {
                mCallback.onOptionSelected("display");
            }
        });

        return rootView;
    }
}
Cập nhật SettingDetailsActivity để load fragment.
public class SettingDetailsActivity extends AppCompatActivity {

    public static final String EXTRA_SETTING_OPTION = "option";

    @Override
    protected void onCreate(Bundle savedInstanceState) {
        super.onCreate(savedInstanceState);
        setContentView(R.layout.activity_setting_details);

        String option = getIntent().getStringExtra(EXTRA_SETTING_OPTION);
        FragmentManager fragmentManager = getSupportFragmentManager();

        if (option == null) {
            finish();
            return;
        }

        switch (option) {
            case "network": {
                fragmentManager.beginTransaction()
                        .add(R.id.settingsContainer, new NetworkSettingsFragment())
                        .commit();
                break;
            }
            case "display": {
                fragmentManager.beginTransaction()
                        .add(R.id.settingsContainer, new DisplaySettingsFragment())
                        .commit();
                break;
            }
            case "storage": {
                fragmentManager.beginTransaction()
                        .add(R.id.settingsContainer, new StorageSettingsFragment())
                        .commit();
                break;
            }
        }
    }
}
Bây giờ khởi chạy ứng dụng và chọn một tùy chọn để mở activity chi tiết.
Ở phần sau ta sẽ tìm hiểu cách thiết lập layout 2 ngăn tương thích với từng thiết bị
Theo dõi VnCoder trên Facebook, để cập nhật những bài viết, tin tức và khoá học mới nhất!