- Bài 1: Tổng quan về hệ điều hành Android
- Bài 2: Lập trình Android với Android studio
- Bài 3: Các thành phần cơ bản trong một ứng dụng Android
- Bài 4: Activity
- Bài 5: Fragment
- Bài 6: Các thành phần giao diện cơ bản trong Android
- Bài 7: Layout trong Android : Phần 1
- Bài 8: Layout trong Android : Phần 2
- Bài 9: Style và Theme trong Android
- Bài 10: Listview trong Android
- Bài 11: RecyclerView trong Android
- Bài 12: Menu trong Android
- Bài 13: Sử dụng Dialog trong Android
- Bài 14: AndroidManifest.xml Trong Android
- Bài 15: Các tài nguyên và ứng dụng cơ bản trong Android
- Bài 16: Intent trong Android
- Bài 17: Lưu trữ dữ liệu trong Android
- Bài 18: Service trong Android
- Bài 19: Content provider trong Android
- Bài 20: Broadcast Receivers trong Android
- Bài 21: SQLite trong Android
- Bài 22: Android notification
- Bài 23: Animation trong Android
- Bài 24: Android Drawables
- Bài 25: Room trong Android
- Bài 26: CursorLoader trong Android
- Bài 27: Databinding trong Android
- Bài 28: Toolbar, ActionBar trong lập trình Android
- Bài 29: AsyncTask – thread & handler trong Android
- Bài 30: Các thư viện thường dùng trong Android
- Bài 31: Tìm hiểu về MVC, MVP và MVVM
- Bài 32: AlarmManager trong Android
- Bài 33: Permission trong Android
- Bài 34: Đóng gói ứng dụng Android
Bài 22: Android notification - Lập trình Android cơ bản
Đăng bởi: Admin | Lượt xem: 5750 | Chuyên mục: Android
1. Giới thiệu
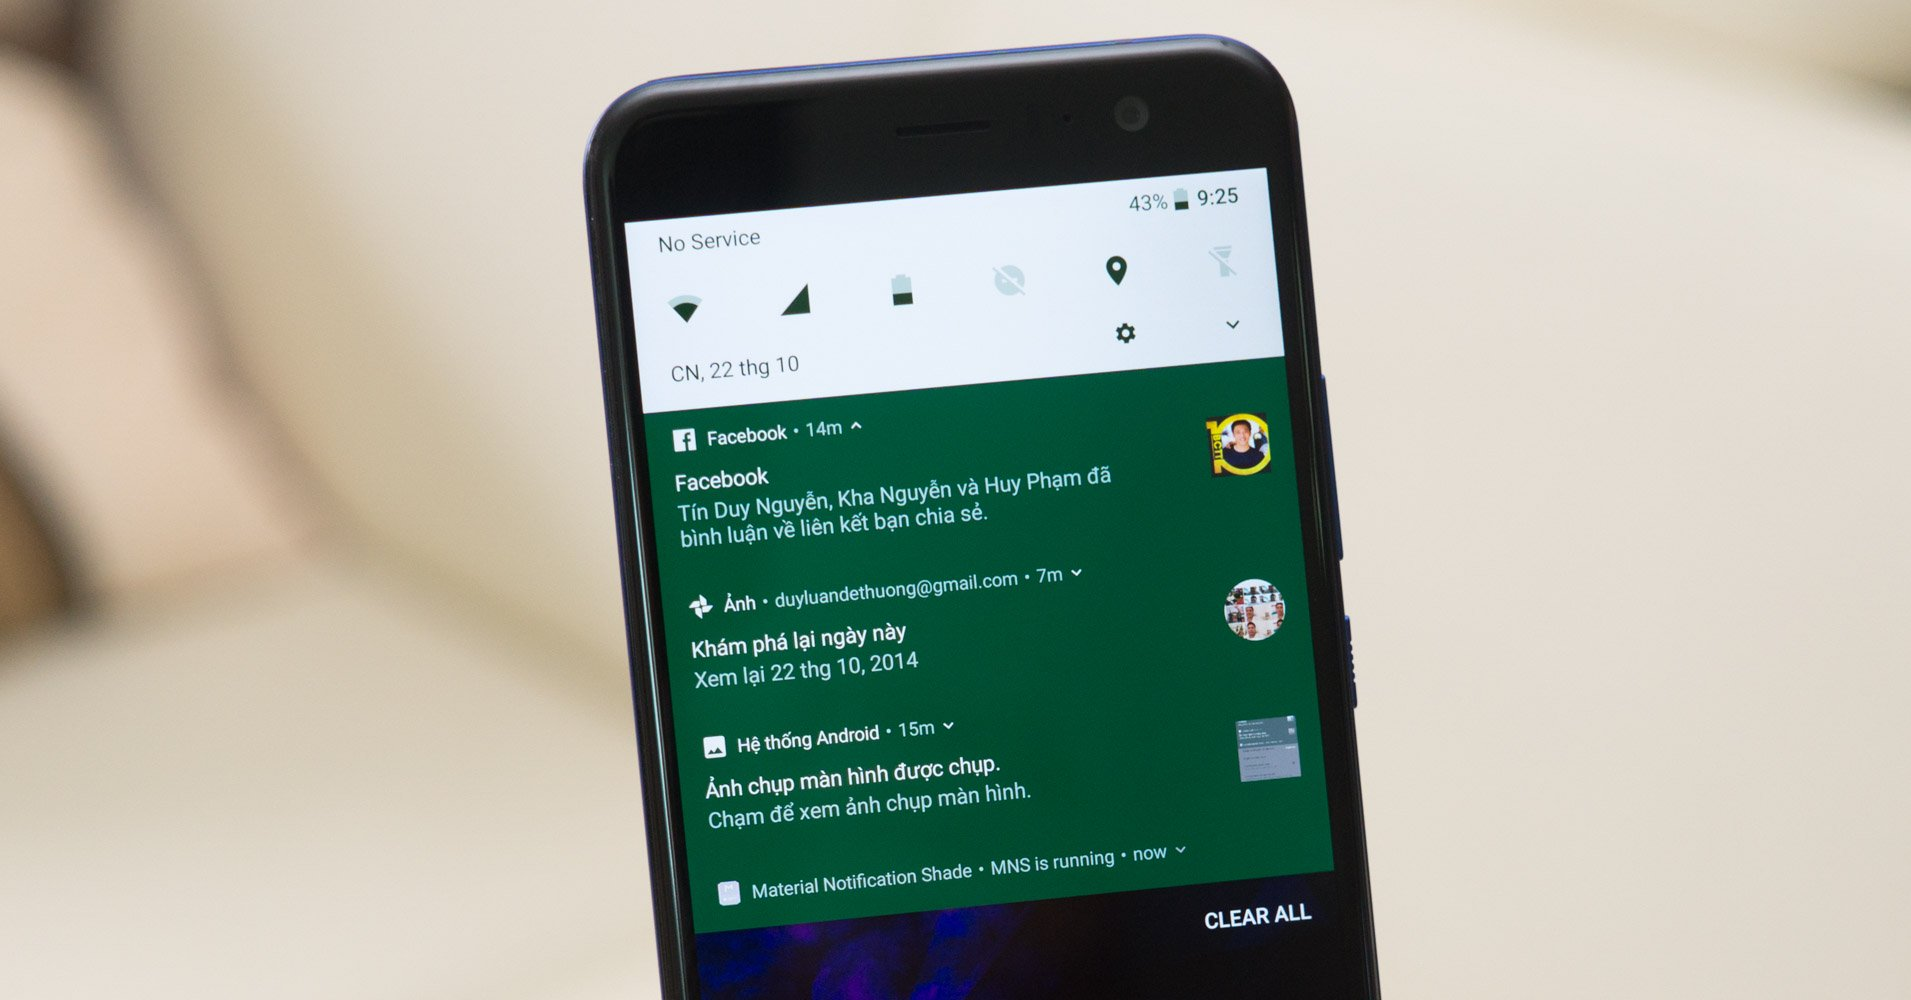
Notification trong Android là một user interface element, nó được hiện thị ở bên ngoài user interface của ứng dụng để thông báo cho người dùng những thông tin cần thiết. Người dùng có thể xem được những thông báo này ở màn hình khóa ( đối với Android Lollipop ) hoặc từ Notification Drawer.
Hình ảnh cho notification.

Để tạo một notification trong Android, bạn nên sử dụng NotificationCompat.Builder. Một notification được tạo ra phải có ít nhất ba thông tin dưới đây :
- 1 small icon, sử dụng method setSmallIcon()
- 1 title, sử dụng method setContentTitle()
- Nội dung của notificaiton, sử dụng method setContentText()
Để Notification hiển thị cho người dùng, bạn phải sử dụng NotificationManager như sau :
- Tạo một đối tượng của NotificationManager
- Sử dụng method notify() của đối tượng NotificationManager để đẩy thông báo cho người dùng bằng cách truyền vào hai tham số : Id của notification và đối tượng Notification.
Tạo action cho Notification trong Android Khi người dùng chạm vào Notification, bạn nên có navigation đến một Activity nào đó. Như vậy, bạn sẽ tạo một action cho Notification. Việc tạo action cho Notification, bạn nên sử dụng PendingIntent bằng cách sau:
- Tạo Intent với Activity sẽ được hiển thị khi người dùng chạm vào Notification
- Tạo PendingIntent để mang thông tin của Intent khi gửi cho Notification
2. Thực hành tạo Notification
Trước tiên chúng ta hay tìm hiểu về các thành phần của notification nhé.

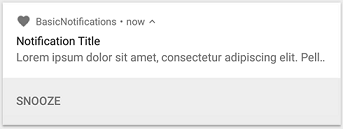
Một Notification đầy đủ bao gồm 6 thành phần như ảnh trên những thành phần đó là :
- Small icon: Nó là cần thiết và được gắn qua setSmallIcon().
- App name: Nó được cung cấp bởi hệ thống.
- Timestam: Nó được cung cấp bởi hệ thống, nhưng bạn có thể override với setWhen() hoặc không hiển thị với setShowWhen(false).
- Large icon: Nó không bắt buộc phải có (nó thường được sử dụng các hình ảnh liên lạc, không sử dụng nó cho icon ứng dụng của bạn) và gán nó qua setLargeIcon().
- Title: Nó là không bắt buộc và gán nó qua setContentTitle().
- Text: Nó không bắt buộc bạn có thể gán nó qua setContentText(). Để gán quyền ưu tiên cho một notification bạn gán qua setPriority(). Giá trị priority xác định mức độ được hiển thị trong các tình huống khác nhau trong Android 7.1 hoặc thấp hơn. (Với Android 8.0 hoặc cao hơn, bạn phải gán giá trị chanel importance - sẽ được trình bày ở phần dưới đây.)
NotificationCompat.Builder mBuilder = new NotificationCompat.Builder(this, CHANNEL_ID)
        .setSmallIcon(R.drawable.notification_icon)
        .setContentTitle(textTitle)
        .setContentText(textContent)
        .setPriority(NotificationCompat.PRIORITY_DEFAULT);
Chú ý rằng hàm khởi tạo của Notification.Builder yêu cầu bạn truyền vào một chanel ID. Nó được yêu cầu để tương thích với Android 8.0(API level 26) hoặc cao hơn, nhưng nó sẽ bị lờ đi ở các phiên bản cũ hơn (nếu bạn không truyền vào chanel ID các thiết bị Android 8.0 hoặc hơn sẽ không hiển thị notification).
Mặc định, nội dung của notification bị cắt bỏ một phần để vừa vào một dòng. Nếu bạn muốn notification của bạn nhiều nội dung hơn, bạn có thể sử dụng setStyle(). Ví dụ:
NotificationCompat.Builder mBuilder = new NotificationCompat.Builder(this, CHANNEL_ID)
        .setSmallIcon(R.drawable.notification_icon)
        .setContentTitle("My notification")
        .setContentText("Much longer text that cannot fit one line...")
        .setStyle(new NotificationCompat.BigTextStyle()
                .bigText("Much longer text that cannot fit one line..."))
        .setPriority(NotificationCompat.PRIORITY_DEFAULT);
2.1 Tạo một chanel và gán giá trị importance
Trước khi bạn có thể một tạo ra một notification ở Android 8.0 và cao hơn, bạn phải đăng ký notification channel với hệ thống qua một instance của NotificationChannel để createNotificationChannel(). Bạn hãy xem ví dụ dưới đây để hiểu hơn:
private void createNotificationChannel() {
    // Create the NotificationChannel, but only on API 26+ because
    // the NotificationChannel class is new and not in the support library
    if (Build.VERSION.SDK_INT >= Build.VERSION_CODES.O) {
        CharSequence name = getString(R.string.channel_name);
        String description = getString(R.string.channel_description);
        int importance = NotificationManager.IMPORTANCE_DEFAULT;
        NotificationChannel channel = new NotificationChannel(CHANNEL_ID, name, importance);
        channel.setDescription(description);
        // Register the channel with the system; you can't change the importance
        // or other notification behaviors after this
        NotificationManager notificationManager = getSystemService(NotificationManager.class);
        notificationManager.createNotificationChannel(channel);
    }
}
Bạn nên thực hiện đoạn code trên ngay khi ứng dụng của bạn bắt đầu và bạn có thể thực hiện đoạn code trên lặp lại nhiều lần mà không gây lỗi gì.
Chú ý rằng hàm khởi tạo của NotificationChanel yêu cầu một giá trị importance, giá trị importance này bạn có thể lấy một hằng số từ NotificationManager. Giá trị này xác định notification được hiển thị không trong các trường hợp khác nhau, bạn vẫn lên gán cả priority cho Android 7.1 hoặc thấp hơn. Mặc dù bạn phải gán giá trị importance/prioty, nhưng hệ thống không đảm bảo việc hiện thị notification của bạn. Trong một số trường hợp hệ thống có thể thay đổi giá trị importance dựa vào các yếu tố khác, và người dùng luôn luôn có thể định nghĩa lại importance cho mối chanel.
2.2 Xử lí sự kiện khi người dùng chạm vào notification
Tất cả các notification lên phản hồi lại hành động chạm vào notification, thường sẽ mở lên một activity trong ứng dụng của bạn. Bạn cần tạo một context intent định nghĩa với một pendingIntent và truyền vào setContentIntent().
Bạn xem ví dụ dưới đây:
// Create an explicit intent for an Activity in your app
Intent intent = new Intent(this, AlertDetails.class);
intent.setFlags(Intent.FLAG_ACTIVITY_NEW_TASK | Intent.FLAG_ACTIVITY_CLEAR_TASK);
PendingIntent pendingIntent = PendingIntent.getActivity(this, 0, intent, 0);

NotificationCompat.Builder mBuilder = new NotificationCompat.Builder(this, CHANNEL_ID)
        .setSmallIcon(R.drawable.notification_icon)
        .setContentTitle("My notification")
        .setContentText("Hello World!")
        .setPriority(NotificationCompat.PRIORITY_DEFAULT)
        // Set the intent that will fire when the user taps the notification
        .setContentIntent(pendingIntent)
        .setAutoCancel(true);
Chú ý code phía trên gọi đến setAutoCancel(), nó sẽ tự động xóa notification khi người dùng chạm vào nó.
Phương thức setFlags() sẽ giúp trải nghiệm của người dùng tốt hơn kho mở ứng dụng của bạn qua notification. Nhưng việc đó tùy thuộc vào kiểu activity mà bạn muốn chạy, có thể là một trong các điều sau:
Một activity tồn tại dành riêng cho các phản hồi từ notification. Người dùng không hay điều hướng đến activity nay. Thông thường các activity này được khởi tạo trong một task mới. Một activity tồn tại trong luồng ứng dụng thông thường trong app của bạn, trong trường hợp này lên quay lại activity bằng back stack.
2.3 Hiển thị notification
Để hiển thị notification, bạn cần gọi NotificationManagerCompat.notify(), truyền vào một ID duy nhất cho notification và NotificationCompat.Builder.build(). Ví dụ:
NotificationManagerCompat notificationManager = NotificationManagerCompat.from(this);

// notificationId is a unique int for each notification that you must define
notificationManager.notify(notificationId, mBuilder.build());
Nhớ rằng bạn lên lưu lại notification ID bởi vì bạn sẽ cần nó sau này cho việc chỉnh sửa hoặc xóa notification.
Chú ý: Bắt đầu từ Android 8.1 (API level 27), ứng dụng của bạn không thể phát âm thanh nhiều lần cho các notification trong một giây. Nếu ứng dụng của bạn tạo ra nhiều notification trong một giây, thì tất cả các notification sẽ xuất hiện, nhưng chỉ notification đầu tiền tại mỗi giây phát ra âm thanh.
3. Thêm action buttons
Một notification có thể cung cấp tối đa ba action button cho phép người dùng phản hồi nhanh, chẳng hạn như báo lại lời nhắc, hoặc thậm chí trả lời tin nhắn văn bản.

Để thêm một button, truyền một PendingIntent vào phương thức addAction(). Thay vì mở một activity, bạn có thể bắt đầu một BroadcastReceiver để thực hiện một việc dưới background mà không làm gián đoạn ứng dụng đang chay của bạn. Ví dụ:
Intent snoozeIntent = new Intent(this, MyBroadcastReceiver.class);
snoozeIntent.setAction(ACTION_SNOOZE);
snoozeIntent.putExtra(EXTRA_NOTIFICATION_ID, 0);
PendingIntent snoozePendingIntent =
        PendingIntent.getBroadcast(this, 0, snoozeIntent, 0);

NotificationCompat.Builder mBuilder = new NotificationCompat.Builder(this, CHANNEL_ID)
        .setSmallIcon(R.drawable.notification_icon)
        .setContentTitle("My notification")
        .setContentText("Hello World!")
        .setPriority(NotificationCompat.PRIORITY_DEFAULT)
        .setContentIntent(pendingIntent)
        .addAction(R.drawable.ic_snooze, getString(R.string.snooze),
                snoozePendingIntent);
4. Thêm một hành động trả lời trực tiếp
Việc phản hồi trực tiếp trên notification, được giới thiệu từ Android 7.0 (API level 24), nó gửi nội dung này đến ứng dụng của bạn mà không cần mở một activity. Ví dụ, bạn có thể để người dùng trả lời tin nhắn trực tiếp trên notification.

4.1 Thêm một button phản hồi
- Tạo một instance của RemoteInput.Builder để thêm một button. Hàm khởi tạo của phương thức này yêu cầu một biến string được hệ thống sử dụng như một khóa cho dữ liệu nhâp vào. Ví dụ:
// Key for the string that's delivered in the action's intent.
private static final String KEY_TEXT_REPLY = "key_text_reply";

String replyLabel = getResources().getString(R.string.reply_label);
RemoteInput remoteInput = new RemoteInput.Builder(KEY_TEXT_REPLY)
        .setLabel(replyLabel)
        .build();
Tạo một PendingIntent cho button phản hồi.
// Build a PendingIntent for the reply action to trigger.
PendingIntent replyPendingIntent =
        PendingIntent.getBroadcast(getApplicationContext(),
                conversation.getConversationId(),
                getMessageReplyIntent(conversation.getConversationId()),
                PendingIntent.FLAG_UPDATE_CURRENT);
Chú ý: Nếu bạn sử dụng lại PendingIntent, người dùng có thể phản hồi cuộc trò chuyện với nội dung khác như người dùng nhập. Bạn phải cung cấp các request code khác nhau cho mỗi cuộc trò chuyện hoặc cung cấp một intent không trả về true khi người dùng gọi equal() trong intent phản hồi của bất cứ cuộc trò chuyện nào khác. Conversation ID thường được thêm bundle của intent.
- Gán đối tượng RemoteInput vào addRemoteInput().
// Create the reply action and add the remote input.
NotificationCompat.Action action =
        new NotificationCompat.Action.Builder(R.drawable.ic_reply_icon,
                getString(R.string.label), replyPendingIntent)
                .addRemoteInput(remoteInput)
                .build();
Đưa ra thông báo
// Build the notification and add the action.
Notification newMessageNotification = new Notification.Builder(mContext, CHANNEL_ID)
        .setSmallIcon(R.drawable.ic_message)
        .setContentTitle(getString(R.string.title))
        .setContentText(getString(R.string.content))
        .addAction(action)
        .build();

// Issue the notification.
NotificationManagerCompat notificationManager = NotificationManagerCompat.from(this);
notificationManager.notify(notificationId, newMessageNotification);
4.2 Lấy thông tin phản hồi từ người dùng
Để lấy thông tin mà người dùng nhập từ notification, gọi RemoteInput.getRsultsFromIntent(), thông qua Intent nhận từ BroadcastReceiver:
private CharSequence getMessageText(Intent intent) {
    Bundle remoteInput = RemoteInput.getResultsFromIntent(intent);
    if (remoteInput != null) {
        return remoteInput.getCharSequence(KEY_TEXT_REPLY);
    }
    return null;
 }
Sau khi bạn xử lí dữ liệu, bạn phải cập nhật lại notification bằng cách gọi NotificationManagerCompat.notify() với cùng một ID hoặc tag(nếu sử dụng). Việc này cần thiết để che đi giao diện phản hồi và xác nhận với người dùng là phản hồi của họ đã được gửi đi.
// Build a new notification, which informs the user that the system
// handled their interaction with the previous notification.
Notification repliedNotification = new Notification.Builder(context, CHANNEL_ID)
        .setSmallIcon(R.drawable.ic_message)
        .setContentText(getString(R.string.replied))
        .build();

// Issue the new notification.
NotificationManagerCompat notificationManager = NotificationManagerCompat.from(this);
notificationManager.notify(notificationId, repliedNotification);
5. Hiển thị notification khi khóa màn hình
Để kiểm soát mức độ hiển thị của của notification từ màn hình khóa, bạn gọi setVisibility() và có các giá trị cụ thể sau:
- VISIBILITY_PUBLIC hiển thị đầy đủ nội dung của notification.
- VISIBILITY_SECRET không hiển thị notification ở màn hình khóa.
- VISIBILITY_PRIVATE hiển thị các thông tin notification cơ bản, như icon, tiêu đề, nhưng che đi nội dung.
Notification sẽ hiển thị cho đến khi một tròn các hành động sau sảy ra:
- Người dùng loại bỏ thông báo.
- Người dùng chọn vào notification, và bạn gọi vào setAutoCancel() khi bạn tạo notification.
- Bạn gọi cancel() cho một notification ID cụ thể. Phương thức này xóa notification ngay cả khi nó đang diễn ra.
- Bạn có thể gọi cancelAll(), nó sẽ xóa hết tất cả các notification bạn đa tạo ra trước đó.
- Nếu bạn gán một giá trị timeout khi tạo một notification sử dụng setTimeoutAfter(), hệ thống sẽ hủy notification sau một thời gian cụ thể.
6. Tổng kết
Cảm ơn các bạn đã theo dõi bài viết , hi vọng những kiến thức trong bài biết sẽ giúp ích được ít nhiều cho công việc của các bạn.

Theo dõi VnCoder trên Facebook, để cập nhật những bài viết, tin tức và khoá học mới nhất!
- Bài 1: Tổng quan về hệ điều hành Android
- Bài 2: Lập trình Android với Android studio
- Bài 3: Các thành phần cơ bản trong một ứng dụng Android
- Bài 4: Activity
- Bài 5: Fragment
- Bài 6: Các thành phần giao diện cơ bản trong Android
- Bài 7: Layout trong Android : Phần 1
- Bài 8: Layout trong Android : Phần 2
- Bài 9: Style và Theme trong Android
- Bài 10: Listview trong Android
- Bài 11: RecyclerView trong Android
- Bài 12: Menu trong Android
- Bài 13: Sử dụng Dialog trong Android
- Bài 14: AndroidManifest.xml Trong Android
- Bài 15: Các tài nguyên và ứng dụng cơ bản trong Android
- Bài 16: Intent trong Android
- Bài 17: Lưu trữ dữ liệu trong Android
- Bài 18: Service trong Android
- Bài 19: Content provider trong Android
- Bài 20: Broadcast Receivers trong Android
- Bài 21: SQLite trong Android
- Bài 22: Android notification
- Bài 23: Animation trong Android
- Bài 24: Android Drawables
- Bài 25: Room trong Android
- Bài 26: CursorLoader trong Android
- Bài 27: Databinding trong Android
- Bài 28: Toolbar, ActionBar trong lập trình Android
- Bài 29: AsyncTask – thread & handler trong Android
- Bài 30: Các thư viện thường dùng trong Android
- Bài 31: Tìm hiểu về MVC, MVP và MVVM
- Bài 32: AlarmManager trong Android
- Bài 33: Permission trong Android
- Bài 34: Đóng gói ứng dụng Android


